As I was working on the CAD drawings for Sipat a few showed interest in versions in larger scales. Both of the versions I've done are a kind of 'Thank You' and I hope they prove useful. In these larger scales I have put the rivet detail on the model as hopefully the surface can be smoothed around them. I'd also suggest buying them in WSF (White Strong and Flexible) from Shapeways as they cost a small fortune in FUD due to the big increase in volume over the O9 version.
Sipat in 1/17 Scale
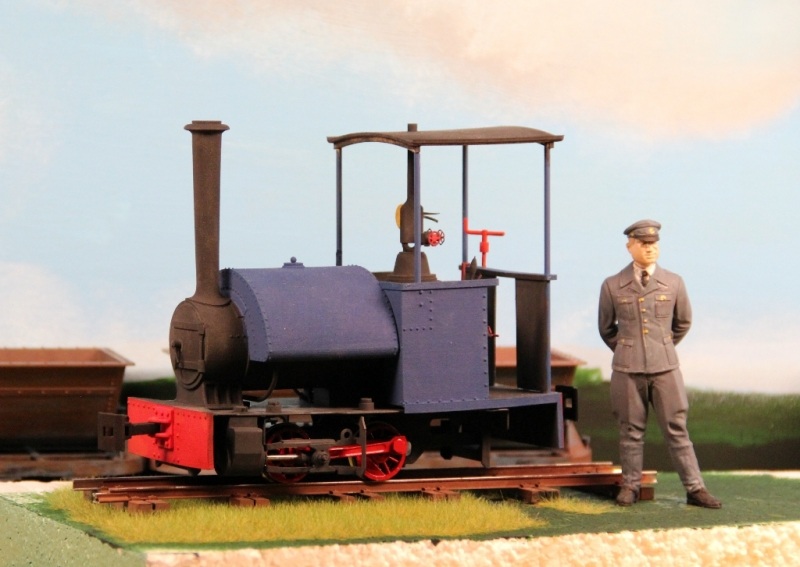
Henrik Laurell's website was one of the insprations for making Sipat in O9, and the photos on it were very useful in getting some details right, so I was happy to re-scale Sipat to the scale he works in. We have jointly developed the 1/17 model to fit on an ETS #225 chassis. Henrik has posted pictures of his pair of Bagnalls on his website and explained a little of how he has begun to finish them off. The blue loco is the production model, whilst the red loco was the first prototype print (which had a couple of changes made to it to help fit the chassis better). You can order the 1/17 Bagnall Sipat from Shapeways.
Sipat in 1/24 (Gn15) scale
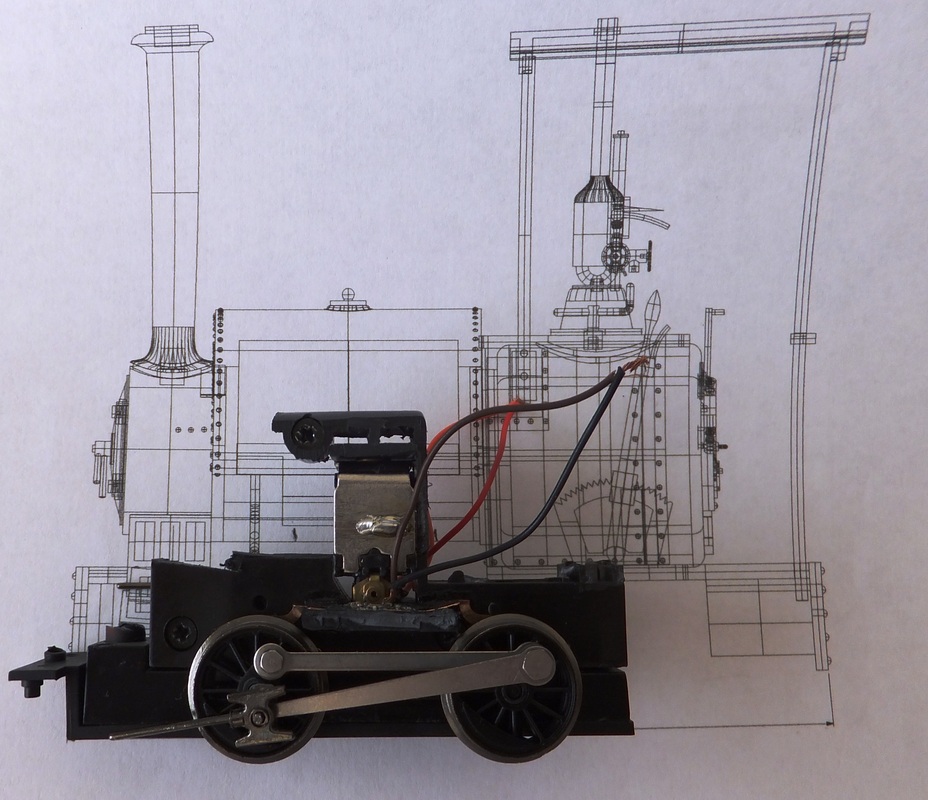
I have only recently returned to modelling after an absence of a few years. One thing that drew me back into modelling was the the modelling on the gnatterbox forum, where some very talented modellers build 15" and 18" stock on 16.5mm track. Although I mostly post my work on NGRM-Online these days, the small Bagnalls have been discussed a few times on the gnatterbox, so I figured someone there might appreciate me making one available. The model fits onto a Bachmann 'Percy' chassis (actually mine is a 'Greg' chassis, as can be found in some UK trainsets. It is the same but lacks the gears for the moving eye mechanism). It may well be possible to use the body with other 4 coupled chassis of similar wheelbase (31mm) but you'd probably need to alter the hole in the boiler to fit, which shouldn't be too hard with knife, razor saw and files. The cab supports should be made from 2mm brass rod, and the brake standard from 1.5mm rod. More details on the final finishing of the body will be put on here once the test print comes back from shapeways.
slimming percy down
A few photos showing how the Percy/Greg chassis is modified. All my modifications were done using a Stanley Knife and Razor Saw. First Step is to dismantle everything. The pickups are mounted on the footplate, which is a pain, as we don't want the footplate (the cylinders are too, but the body has new cylinders on it). By scoring almost all the way through with a Knife, then snapping off the pickups with a pair fo pliers they both came off intact. Put them to one side, we'll put them back on when reassembling (If you don't want the DCC chip, snip it off now and we can connect the 2 wires from the pickups to the motor wires later).
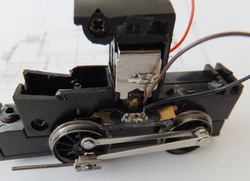
Sadly the Percy chassis comes with a strange black oval shape moulded around the motor. Most of this is where the gears for the eye mechanism would go. Leaving it on would give us a strange shape beneath our boiler, so we need to get rid of it. The tricky part is that it also holds the motor in place. Hopefully you can see the bits I've removed in the photos. Basically the front part is removed back to where the screw is, and the width is removed on the bit around the motor until it is the same width as the chassis block. The cut out in Sipat's boiler is 16mm wide, so there should be enough room to play with (the chassis on mine is now about 13-14mm across the motor).
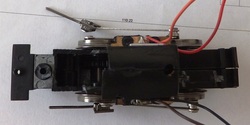
After all the cutting and sawing, there will be lots of small bits of plastic in your mechanism, whilst it is still dismantled I washed the parts (except the electrical bits) in warm soapy water then rinsed them well. I removed the grease Bachmann models always come clogged up with. The motor was washed quickly with alcohol. Once they've dried we can then put it all back together.
The pickups were put back to where they had been before removal from the footplate. I put superglue on the uncut side and glued them to the chassis block (careful not to get any in the motor). A bit of Lubricating oil in the gears and axles, and it runs just as before.
The pickups were put back to where they had been before removal from the footplate. I put superglue on the uncut side and glued them to the chassis block (careful not to get any in the motor). A bit of Lubricating oil in the gears and axles, and it runs just as before.
I'm afraid that due to the printing costs being somewhat higher than hoped for (volume increases cubically, so the model ends up priced significantly higher than the O scale version) I suspect that the cost of this model will be outside of the budget of most Gn15 modellers. I completely understand, as I suspect it might have been pushing my budget too were I to model in this scale. I have finished the product and the test print seems fine, but have decided to focus on O9 in the future as the volume of material is much smaller, allowing printing prices to be kept down. I will also have more motivation for producing models in a scale in which I model (and more use for the prototype prints which line my modelling shelf!).
